Showing posts with label Tips and Tricks. Show all posts

Thursday, August 16, 2012

Addendum: How to Get ARCs


How to Get ARCs

The Edelweiss Addendum


What You Will Learn

A little while back I wrote a step-by-step guide on how to get ARCs. Since that post, the website Edelweiss has become a new way to get e-ARCs!


Let's Do This!

What is Edelweiss: 

Edelweiss is basically a giant collection of publisher catalogs that now also offers e-galleys on an individual approval basis (like NetGalley). Edelweiss offers publishing professionals, booksellers, librarians, reviewers, bloggers, etc. the ability to get interactive with the catalogs.

What does this mean exactly?  I'm not really sure. I never used Edelweiss at my library and I haven't explored the site that thoroughly. I feel mostly lost when it comes to utilizing all of the interactive stuff, but I do like it for what I DO use it for, which is mostly for two things:
  • Browsing through publisher catalogs. This helps me add to my TBR and get an idea of what books are going to be published soon. It's so much easier to go straight to Edelweiss and browse through their publisher list rather than tracking down the catalogs on each individual publisher's website (which is what I used to do pre-Edelweiss)
  • Getting e-galleys. I haven't done this much yet, but it seems to me like it's very similar to NetGalley. So far I've requested four galleys and been approved for three. As with all of my experiences requesting review copies, I have NO CLUE why I get the responses I get. To add even more confusion, the publisher who approved me (HarperTeen) rarely approved my NetGalley requests, but the publisher who denied me (Random House) almost always approved my NetGalley requests. So, yeah, don't take it personally.

How do you request e-galleys?

Normally I'd write up a tutorial here, but Miss Remmers from Miss Remmers' Reviews has already written a fantastic tutorial (complete with screen caps) so I'm just going to direct you to her post.

Some things to keep in mind: 

You need to provide the publisher with a profile of your blog. This is where you'd write things like your stats and reach. This is pretty similar to your bio in NetGalley or what you'd include in an email request.

You need to provide the publisher with a reason for why you're requesting. This is different from NetGalley, but you probably include something along these lines when you write an email request. You need to go beyond your stats and say why you're requesting this specific title and make a little case for why you should get it. I think. I'm not 100% clear on this part, but you need to write something for every book you request.

You do NOT get an email notifying you if you've been approved or denied. You need to give Edelweiss lots of page refresh hits by checking back periodically to see if you've been approved or not (go to the tab "Review Copies" then click on the subtab "Requests"). This is annoying and I wish they'd send you an email giving you a heads up. *Edited: It seems this may not be the case as most, though not all, other bloggers have received notification emails. Another puzzle!

It took between one and two weeks for my requests to be approved/denied, but I haven't requested enough to get a gauge on how long this process can take. *Edit: Based on blogger feedback, the time it takes seems to vary.

If you get approved for the book, you can go back to your "Requests" page and download the book. Click on the title and it will bring you to a page for the book. You'll see a button on the right side of the page that's green and says "Download Review Copy" Click that and download your book. I don't know what formats the e-galleys come in, but I've read them in Adobe Digital Editions, same as my NetGalley books.

E-galleys have EXPIRATION dates. If you go to your "Requests" page, you'll see a column for this and there will be a date listed next to the books you've been approved for. Download the book before this date or you won't get to read it. I'm not sure if that date is the last date to download or the last date to read. 


Have you used Edelweiss?
What has your experience been like?
Do you have any advice to offer about using Edelweiss? 
Do you have any questions about using Edelweiss?


Click here to read previous Tips & Tricks Posts 

Monday, July 23, 2012

Tips & Tricks: How to Make Colored Boxes Align in a Row


How to Make Colored Boxes
Align in a Row


What You Will Learn

We've already gone over how to make a colored box, but that code only lets you make one colored box per line. Which is great, but you can't make two boxes sit side by side that way and sometimes that's really what you want to do.

I've gotten a lot of questions about this and sadly I didn't have an answer. Which was super annoying. So I dedicated my lunch hour last Friday to finally trying to figure out how to do this, and success! So now today we're going to learn how to make colored boxes sit next to one another! 

Your text here!Your text here! Your text here!Your text here!


Let's Do This!

Step 1: The Code

<center><table border="0" cellspacing="4"><tbody>
<tr> <td bgcolor="#B0171F" style="color: white;">Your text here!</td><td bgcolor="#4B0082" style="color: white;">Your text here!</td> <td bgcolor="#00688B" style="color: white;">Your text here!</td><td bgcolor="FF6347" style="color: white;">Your text here!</td> </tr>
</tbody></table>
</center>

Step 2: Setting the alignment

<center><table border="0" cellspacing="4"><tbody>
<tr> <td bgcolor="#B0171F" style="color: white;">Your text here!</td><td bgcolor="#4B0082" style="color: white;">Your text here!</td> <td bgcolor="#00688B" style="color: white;">Your text here!</td><td bgcolor="FF6347" style="color: white;">Your text here!</td> </tr>
</tbody></table>
</center>

Want your boxes to align in the center of your screen? Great! Copy the code exactly.

Want your boxes to align to the left? Replace the word "center" with the word "left"

Want your boxes to align to the right? Replace the word "center" with the word "right"

Easy peasy!

Step 3: Setting the borders

<center><table border="0" cellspacing="4"><tbody>
<tr> <td bgcolor="#B0171F" style="color: white;">Your text here!</td><td bgcolor="#4B0082" style="color: white;">Your text here!</td> <td bgcolor="#00688B" style="color: white;">Your text here!</td><td bgcolor="FF6347" style="color: white;">Your text here!</td> </tr>
</tbody></table>
</center>

See the zero? That's because I have no borders on here. If you want borders, then go ahead and add a number there instead of zero. Play around with the numbers until you get a border thickness you like. The larger the number you put in there, the thicker your borders.


Step 4: Setting the space between your boxes

<center><table border="0" cellspacing="4"><tbody>
<tr> <td bgcolor="#B0171F" style="color: white;">Your text here!</td><td bgcolor="#4B0082" style="color: white;">Your text here!</td> <td bgcolor="#00688B" style="color: white;">Your text here!</td><td bgcolor="FF6347" style="color: white;">Your text here!</td> </tr>
</tbody></table>
</center>

"Cellspacing" describes the amount of white space you see between my color boxes. The larger the number, the wider the space. If you don't want any space between your boxes, then change this number to 0 (that's a zero, not the letter o). 

Step 5: Setting the background color

<center><table border="0" cellspacing="4"><tbody>
<tr> <td bgcolor="#B0171F" style="color: white;">Your text here!</td><td bgcolor="#4B0082" style="color: white;">Your text here!</td> <td bgcolor="#00688B" style="color: white;">Your text here!</td><td bgcolor="FF6347" style="color: white;">Your text here!</td> </tr>
</tbody></table>
</center>

Pull up your handy dandy color code list (I like using this one) and pick whatever color you want to use! Make sure you use the "Hex" color code (you'll see a column in the link I gave called "Hex") and make sure you include the #

In my example code, I have four colored boxes, and so you'll see this code used four times. You can use a different color code for each box, or you can use the same color each time. Mix it up however you prefer!

Note: If you know the HTML acceptable name of the color you want to use, then you can type that name in instead of the number sign and letters. 

Step 6: Setting the font color

<center><table border="0" cellspacing="4"><tbody>
<tr> <td bgcolor="#B0171F" style="color: white;">Your text here!</td><td bgcolor="#4B0082" style="color: white;">Your text here!</td> <td bgcolor="#00688B" style="color: white;">Your text here!</td><td bgcolor="FF6347" style="color: white;">Your text here!</td> </tr>
</tbody></table>
</center>

See the note in step 5 about using the name of the color if you know it? That's what I did in this example. If you don't know the name of the color you want to use, then just do it the same way you did with the background color (select your color from the list and then copy the Hex code. But, helpful hint, that list I gave you? The names of the colors there are the HTML acceptable names!). 

Same as step 5, you'll see this code four times because I have four boxes. You can set them all for the same font color or you can mix them up however you'd like.

Step 7: What if I want colored boxes next to each other AND on top of each other?

Your text here!Your text here! Your text here!
Your text here!


<center><table border="0" cellspacing="4"><tbody>
<tr> <td bgcolor="#B0171F" style="color: white;">Your text here!</td><td bgcolor="#4B0082" style="color: white;">Your text here!</td> <td bgcolor="#00688B" style="color: white;">Your text here!</td></tr>
<tr><td bgcolor="FF6347" style="color: white;">Your text here!</td> </tr>
</tbody></table>
</center>

See the tags with the "tr" inside? Those are the tags that determine what line your box sits on in relation to your other boxes.

See how between my first two "tr" tags I have code for three colored boxes? Now check out my colored boxes above. See how I have three colored boxes in a row? If you want three colored boxes next to each other all in the same row, then you need to put your "tr" tags BEFORE your first box code and AFTER your last box code.

Then, if you want to make a second row, just put new "tr" tags around more colored box code and then all of the boxes you include in those tags will appear together in a separate row. Make sense?

Step 8: Can we break that code down one more time?

<center><table border="0" cellspacing="4"><tbody>
<tr>
<td bgcolor="#B0171F" style="color: white;">Your text here!</td><td bgcolor="#4B0082" style="color: white;">Your text here!</td> <td bgcolor="#00688B" style="color: white;">Your text here!</td><td bgcolor="FF6347" style="color: white;">Your text here!</td> </tr>
</tbody></table>
</center>


The code in blue is the code you always need to have, regardless of how many boxes and rows you want. This sets the basic parameters of your colored boxes.

The code in pink is the code for one colored box. If you want multiple boxes, then just copy that code as many times as you want boxes.


I hope that helps!
Have any questions? Feel free to ask in the comments!


Click here to read previous Tips & Tricks Posts

Tuesday, June 19, 2012

Tips & Tricks: More design features to keep in mind

A few weeks ago we talked about some tips to keep in mind when designing your blog. This is part 2 of that discussion.

This post is a little more technical, but don't worry! I've tried to break everything down to the basics. The goal of this post is to give you a starting off point and introduce you to some technical concepts, why they're important, and what they mean for your blog.

I've also included a little advice on how you can apply these concepts to your own blog. If you are trying to make your blog accessible to as many people as possible, then it would be a good idea to follow these tips.

BUT, please keep in mind that your blog is YOUR blog, and ultimately you should do what makes YOU happy.


Browser compatibility

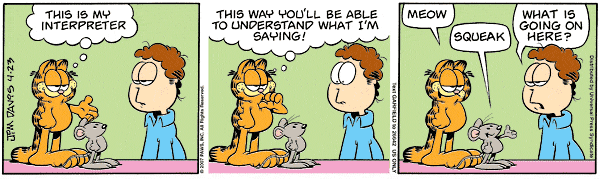
What is it? Browsers include (but are not limited to): Firefox, Internet Explorer, Google Chrome, Safari, and Opera. There are also older and newer versions of each browser. For our purposes, think of browsers as the interpreter in the conversation between your blog and your readers.

Why is it important? Some browsers can interpret every language you can think of, but others are pretty poor interpreters and only speak a few languages. If your readers' browser can't speak your blog's language, then your reader won't be able to see and use your blog properly, if at all.

The great Jim Davis

What should you do? Simple is your friend, again. Stick to the basics of HTML and CSS and you should be better off. Try to avoid using other languages as much as possible. Especially avoid extensions specific to Internet Explorer (IE likes creating elements that chat in their own special language that no one else can understand. Yay!).

Um, but what do you DO? Look at your blog using the most popular browsers (Firefox, Google Chrome, Internet Explorer, especially). If you can, try to check using the most recent version and the version or two before that.

Can you see and use everything as intended? If not, then you might want to remove or reconfigure those elements. If you use Internet Explorer, this advice applies doubly. I know some blogs I read are putting pictures in their posts, but they're using frames specific to IE and, since I use Firefox, I can't see their pictures as a result.


Load speeds

What is it? This is how fast your blog displays on your readers' screens.

Why is it important? Odds are, if your blog takes forever and a day to display, people are going to leave before your blog even finishes loading.

Savage Chickens


What should you do? Avoid doing things that slow down your blog, of course! Most modern internet connections, computers, and browsers are able to load pages very quickly, even if your blog is a bloated mess. Still, it's a good idea to trim the fat when you can.

Um, but what do you DO? These are some things that will bring your blog's load time to a crawl:

Excessive pictures- Obviously I ignore this bit of advice. Most high speed internet connections can handle pictures just fine, and most readers like pictures. I'm a visual person (and shallow) and I'm unlikely to stick around if a blog doesn't give me some kind of eye candy. Blog design is all about compromises (or stubbornly stomping your foot and saying BUT I WANT IT! which is fine too).

Competing backgrounds- This is a good one to trim. What's happening here is you probably added a new background without deleting your old background from your code. So your blog loads the original background first, and then quickly loads the second background on top of the first. This is sloppy code, slows down your blog's load speed, and makes it look amateurish. Delete the old code.

Superfluous code- Blogger LOVES inserting empty code. You won't see this empty code unless you go into HTML editor, but your readers will see the effects through slightly slower load times and, more importantly, strange spacing in your blog posts. Go through your HTML editor and delete all the empty code. Or, better yet, don't create your blog posts in Blogger. (More on this later)


Pretty font- I know, it looks nice. It also slows down your blog's load time, a lot. If you must have pretty font, it's better to keep it in your headers and not on every single letter across your entire blog.

Sidebar widgets- Are your sidebars filled with a million blinking widgets? Forget crawling. Your blog's standing still.


But, again, these are just tips! 
Your blog is YOUR blog and you can do whatever you'd like with it.


Click here to read previous Tips & Tricks Posts 

Friday, June 1, 2012

Designing your blog? Keep these features in mind!

This post is a little more technical, but don't worry! I've tried to break everything down to the basics. The goal of this post is to give you a starting off point and introduce you to some technical concepts, why they're important, and what they mean for your blog.

I've also included a little advice on how you can apply these concepts to your own blog. If you are trying to make your blog accessible to as many people as possible, then it would be a good idea to follow these tips.

BUT, please keep in mind that your blog is YOUR blog, and ultimately you should do what makes YOU happy.


Screen resolution

What is it? Screen resolution is a measure of pixels displayed in each dimension. Don't know what that means? Don't worry. For our purposes, screen resolution means how your blog looks on different screen sizes.

Why is it important? Screen resolution immediately affects how people view your blog. If your blog does not fit comfortably on their screen, then readers are more likely to leave and never return.

What should you do? You will never be able to please everyone, so try to design for the majority. Sign up for Google Analytics to see what screen resolutions are most popular among your readers.

The majority of my readers run 1280x800, 1388x768, and 1024x768. Your readers are probably similar.


Then test your blog on different screen resolutions. The higher the screen resolution you're using to test this, the better (because otherwise you're limited by your own computer's resolution).

Um, but what do you DO? There are three ways that you'll apply this practically: Your header, your sidebars, and your post body.
  • Design your header so it takes up no more than 45% of the screen (less is better!).
  • Horizontal scroll bar = BAD! You need to make your blog narrower.
  • Images cut off on the sides? Not good! You need to make your blog narrower.
This is what my blog looks like on a screen with 800x600 resolution. Good thing the vast majority of my readers use larger screen resolutions!


HTML, CSS, JavaScript, Java, Flash, etc.

What is it? These are different kinds of programming languages (sort of). For our purposes, think of this as your blog having a conversation with your readers' computers. Your blog's code is the language your blog is "speaking" in. The result of this conversation is what your readers see on their screens.

Why is it important? If your blog is speaking one language and your readers' computers are speaking a different language, then you won't be able to communicate.

Some people use older browsers or devices (phones, some tablets, feed readers, etc) that cannot speak these languages. Some people have installed blockers like NoScript, which are the equivalent to saying "Lalala I'm not listening" to languages like JavaScript, Java, and Flash.

Bottom line: If your readers' computers can't or won't speak your blog's language, then your readers won't see and be able to use your blog properly, or even at all. See how dramatic the difference can be:

Stop & Shop's website as viewed with scripts disabled

Same page, but now with scripts enabled.

What should you do? Design your blog using basic HTML and CSS whenever possible. Avoid using JavaScript, Java, Flash, and similar languages or plug ins. This will ensure the largest number of people can see and use your blog.

Um, but what do you DO? Some features that are commonly written using these languages-to-avoid are:
  • Countdown widgets
  • Drop down menus
  • Widgets from sites like LibraryThing and Goodreads
  • Rotating images
  • Videos
  • Images that change when you roll over them
  • Certain types of spoiler tags (more on this in a future T&T post!)
  • Pretty fonts
  • Toggle menus (like the "Readers Also Enjoyed" menu on Goodreads)
  • Certain commenting systems
If you avoid using any of those or similar features, then you should be good to go. Of course, a lot of those features are really nice and it would be a shame not to include them on your blog. So here is where you compromise. Include some that you really want, but also understand that not every reader will be able to see them (so maybe don't make them an integral part of your blog post).

If you're really curious, try installing NoScript and see what it blocks. Everything that's blocked isn't written using basic HTML or CSS and may not be visible or functional for all your readers. Keep in mind: Just because NoScript doesn't block something, that still doesn't mean the element will display for everyone (ex: pretty fonts).

Scripts not allowed or Flash not compatible. This is what I see in your sidebar. Attractive, huh?
Scripts allowed or Flash compatible. Oh! It's a loud, moving poster! Er, great. (or, it would be a loud moving poster if this example weren't just a screen cap)


Stay tuned for part 2 with even more tips!


Click here to read previous Tips & Tricks Posts 

Friday, March 30, 2012

Bloggiesta Tips & Tricks

bloggiesta

Are you participating in Bloggiesta?

I would love to participate in Bloggiesta (both because there are about a million things I've been planning to fix on my blog, and also because I just want an excuse to post that adorable button), but with my big move coming up, I really don't have the time.

BUT, hopefully you are participating! And if you are, I'd love to help. I've written a bunch of tutorials  that you might find useful and I've listed most of them here for you.


Blog Design

Basics

How to Make a Full-Screen Blog Header
How to Make a Sidebar Header
How to Fix Overhanging Sidebar Images
Why you shouldn't use Microsoft Word to write your posts

Icons and Buttons

How to Make a Button
How to Make a Scrolling Widget for Blog Buttons
How to Make Social Networking Icons (Goodreads, Facebook, Twitter, etc)
How to Make an "Email Me" Link and Icon

Personalize

How to Add a Signature to Posts
How to Customize a Comment Form Message

More HTML (made super simple)

How to Make Colored Boxes
How to Make Borders
How to Make a Progress Bar (for challenges)
How to Customize a Progress Bar


Attract Followers

Blog Promotion

How to Increase SEO with Post Titles
How to Increase Blog Readership with Search Engines
4 Ways to Gain Readers Using Comments
3 Ways to Attract Readers Through Hosting
How to add a link to your blog when you leave comments

Suck Readers in for Hours!

How to Make Anchor Text
How to Make Named Attribution Jumps
How to Maximize Links, part 1
How to Maximize Links, part 2
How to Use Labels (Tags) to Increase Blog Traffic


Even though I won't be participating in Bloggiesta this year myself, I'll still be cheering the participants on from the sidelines. Remember,


You can do it!
Feel free to come back here and share your success!

Have you written a tutorial? Share your links in the comments!

.

Thursday, January 26, 2012

Tips & Tricks: Q & A Edition 3


What You Will Learn

A few weeks before Busting the Newbie Blues and Busting the Big Blogger Blues went live, Ruby and I posted up a question form. Readers were encouraged to write whatever newbie or oldie questions they had about blogging.

We've addressed many of these questions throughout our events, but there were a few questions that we either couldn't fit in anywhere else or didn't need an entire post devoted to them. So that's where this post comes in.

If you feel your question still hasn't been answered, please ask again in the comments!

If you have a question you would like answered in a future Tips & Tricks post, I would love it if you filled out THIS FORM. Tips & Tricks posts go up once a month, so it may take a little while for me to get to your question, but I promise you I WILL answer.


Let's Do This!


How do you add originality to your blog? How do you take ideas from other blogs without seeming unoriginal or copying?

The best piece of advice I can think of is to say look at yourself, not everyone else. YOUR voice is what will bring originality to your blog. Let your personality shine through and your blog will be uniquely yours.

But what about features? Memes? Honestly, I wouldn't worry about them. When answering the Busting the Newbie Blues questionnaires, you know what a lot of people DIDN'T like about blogs? When they're filled with memes. You know what people DO want? Quality reviews.

Still stuck? Try this approach:

Other people can be hugely inspiring, but when you look to others for inspiration you walk a tightrope with originality on one side and plagiarism on the other. Of course you do NOT want to end up on the plagiarism side of things (and keep in mind, paraphrasing or taking an idea IS plagiarism!).

Ok, so you're not looking at anyone else now, right? Now I want you to forget about your readers for a minute. *GASP*

Yes, your readers are hugely important, but when you think about them in this context, you're probably thinking of how you can please them. Do you know what that means? PRESSURE! It's incredibly hard to be creative when you're feeling that kind of pressure.

So now you're not looking at anyone else for inspiration and you're not thinking about your readers. What do you do next?

Look in a mirror. Ask yourself, what do YOU want to see? Focus on what YOU want. When you read a review, what do YOU want to know about the book?

How about frustrations? Is there anything that you as a reader and a blogger experience that frustrates you? A problem you've faced? How can you fix that problem? For me, my latest feature was born out of a need for book recommendations.

Once you've brainstormed some ideas, search around a little and see if anyone else is doing something similar. If no one is, then wonderful!

If they are, then no worries. Sure, maybe you'll scrap that idea, but you have discovered that someone is doing something you wanted. Even if it's a loss for the "original idea" category, discovering their feature is still a win for you.

Now get back to that mirror and think of another idea. Or don't. I said this earlier in my discussion post but it bears repeating:

  • When the muse is out on extended vacation, embrace the basics. There is nothing wrong with a review blog with nothing but reviews. You do not have to be the NEXT BIG THING to offer something of value. 

How do you get your heading banner thing to become centered on your blog? Mine isn't.

This probably has to do with your code. I'm not sure what's going on, but try looking in your code for words like "Header," "Align," and "Padding." Maybe your padding is set unevenly? Or your align isn't set for center? I'm sorry I can't be more helpful!

How, in comments, do you link your site so people commenting can check it out?

That is called anchor text, and it is fantastically useful! Check out my Tips & Tricks post called How to Make Anchor Text to learn how. Let me know if you have any trouble with it.

I've been trying to link up my Word97 to make it easier to post but it's just not working. I just love how other bloggers have these neat nice rating images and boxes in their post. I'm so not good with design.

Hm, I'm not sure what you mean about linking up Word97. I will say though, that when it comes to blogging DO NOT use Microsoft Word if at all possible (it took me a while to figure this out). Microsoft Word adds all kinds of extra code that could mess up your formatting and potentially cause errors. See:

Click to see in all it's awesomely bad glory
This is a blog post after I copied it from Microsoft Word. See the arrows? See all that green text? It goes on for almost THREE HUNDRED LINES OF CODE. It is entirely useless and is only there because Microsoft Word wants to be the bane of a blogger's existence.

Every time someone tries to view your post, their browser needs to read every line of code you have written. Look at all that useless code! Sloppy, sloppy.

Click to make larger
Ah, THAT is what I wanted! See how neat and clean it is? See how I couldn't even fit the whole blog post in one screen cap when it was copied from Microsoft Word, but in reality MY work only takes up five tidy little lines? MUCH better.

I highly recommend Notepad or Notepad++.(which is the program I've used to show my code in both of those pictures). Personally, I write all of my blog posts in Notepad++ because it does code highlighting (this is what makes the text different colors, and I am a color coding fanatic).

As for the rating images, I love them too! You can try sites like All Silhouettes or All Vectors to get an image you like for your ratings. You can crop the images using a program like Paint or something more advanced like Photoshop or Gimp (free).

By boxes, if you mean colored boxes, I have a tutorial called How to Make Colored Boxes that explains how you make them. I hope that helps!

And don't worry if you're not good at design. You'll learn! A lot of design is much easier than it seems at first. It's easy to be overwhelmed by design, but if you try to learn things in bite sized baby steps, it's a lot less intimidating. Also remember, a neat and easy to navigate blog is far more important than pretty graphics. 


The form is anonymous, so please don't feel shy at all!

I'm certainly not an expert, but I'll try my hardest to explain what I do know and research what I don't know.

Click here to read previous Tips & Tricks Posts 

Thursday, January 19, 2012

How to Get ARCs: A Step-by-Step Guide

While there are a lot of questions new bloggers have, one of the most frequently asked about topics is that of ARCs or, more specifically, the acquisition of ARCs. To that end, I have compiled all of the information I have gathered regarding ARCs, how you get them, and what you should do with them once you have them.

I am by no means an expert and this post is by no means the end-all-be-all of ARCs, so if you have any additional sources or advice, please share in the comments! Also feel free to ask any questions I may not have addressed and discuss this topic with one another in the comments.


1. What are ARCs and who gets them?

The What

ARCs (Advanced Reader Copies) are copies of a book that are printed up before the book goes on sale and are sent to reviewers, librarians, bookstores, and similar outlets. The purpose of ARCs is to generate early buzz and reviews, encourage purchases, and assist librarians and booksellers in deciding whether or not to purchase a particular book for their collection/stock.

ARCs are marketing tools. ARCs are actually more expensive to produce than a finished copy of a book (I'm always surprised by that!) and only a small number of ARCs are printed.

ARCs are often a little less polished than the final copy (more typos) and may be slightly different from the finished version (names, different wording of some sentences, minor rearrangement, things like that). Because of these changes, reviewers are asked to only pull direct quotes from the finished version of a book. The cover may also differ from the final version.


The Who

Bloggers get ARCs so they can post reviews and help generate buzz for the book. This works primarily as a "word of mouth" type of advertising, so bloggers who have the ability to:
  1. Reach a large number of people, and 
  2. Provide informative reviews that will encourage book sales
are most likely to receive ARCs. Keep in mind, "encourage book sales" doesn't mean "give all 5 star reviews." A blogger encourages book sales by writing informative reviews that give readers an idea of whether or not they will like the book.

As a general rule, the "big" publishers like seeing a blog up and consistently running for around 4-6 months before the blogger requests a print ARC. You don't have to wait nearly as long to request e-ARCs (I got e-ARCs when I posted reviews on Amazon and did not even have a blog). Some indie or self-published authors will begin pitching review requests when a blogger is less than a month old.

There is also an element of chance when it comes to who gets ARCs and who does not. Remember this! I have been denied an electronic ARC only to have a print copy appear in my mailbox a few weeks later. Sometimes bloggers get added onto a publisher's mailing list without doing anything, but more often bloggers must make the first move.

It all depends on a lot of different factors (some known, some seemingly mysterious), patience, persistence, and a little random luck.


2. Where to get ARCs?


E-galleys (electronic ARCs)

E-galleys are the wave of the future! Personally, I'm pretty bummed about this because I don't have an e-reader, but I can see how much more cost effective it is for publishers to distribute ARCs this way.

If you're a new blogger, publishers are also a lot more willing to give you an e-galley than a print copy, so e-galleys are a great way for newbies to get their name on publishers' radars. Here are a few sources to get you started:

NetGalley

Each publisher has different requirements for users requesting galleys. Expiration dates for galleys vary. I have a more in-depth Tips & Tricks post coming up about NetGalley.

Simon & Schuster's Galley Grab

Register an account and, if Simon & Schuster approves you, then they will begin sending a monthly newsletter with galleys you can download. All galleys expire upon publication of the book. As far as I know, this is on temporary hiatus while they make improvements, but you might still be able to register.

Galley Grab is no more! Simon & Schuster has moved its e-galley offerings to Edelweiss.

Edelweiss

See the Edelweiss Addendum post for more information about this e-galley and publisher catalog service!


Print ARCs

There are a bunch of ways you can get your hands on print ARCs, and these are only a few of them.

Publishers

When contacting publishers, look for an email address for the publicity department. If you are requesting a Young Adult title, make sure you send your request to the children's publicity contact. Here are a few links to get you started:
And here are a few catalogs for you to look through (when requesting, it's a good idea to include the Title, Author, ISBN, and release date of the book)

Other places you can find contact information:
  • On the back of ARCs: Usually you'll find publisher contact information on the back of printed ARCs and/or on the copyright page
  • Through your NetGalley emails: When NetGalley sends you an email confirming or denying your request, you can usually find the email address of the publishing contact who handled your request somewhere in the email (look for "on behalf of...")
  • Through your NetGalley approvals: If you are approved for an e-galley through NetGalley, sometimes there is an option to "contact the publisher" and this will provide you with an email address for the publicity contact

Authors

Authors do not receive many ARCs, but sometimes they do and are willing to send you a copy (rarely--usually their friends and family have first dibs, understandably!). Some authors will also forward your information to their publicist.

Many authors state on their site whether or not they can send you an ARC and how you should go about requesting one, so make sure you read their site carefully before you shoot them an email.


LibraryThing's Early Reviewer's Program

I don't have an account with LibraryThing, so I can't speak on it much. I have heard it is a good source, but you need to review each book you receive in order to receive more.

Goodreads First Reads

I received one of my first ARCs through this program when I was first starting out as a blogger. I've since received one more a few months later, but I haven't gotten any since.

You don't have to review these books, but you should and whether or not you review is a consideration for getting more books from them.

ARC Tours

I have only participated in a few ARC tours, but these seem like a great way to get to read ARCs. Sometimes the person putting together the tour will contact you, but more often you approach the tour host and submit an application. There are three types of ARC tours, and you should decide which ones you are comfortable participating in before you commit to any.
  • Tours where you get to keep the book: These are the only tours I will participate in. The pros are obvious- you get to keep the book! Not only do you get a book out of the deal, but you also don't have to pay postage or worry about short deadlines for passing on the book (though you do, of course, still need to make sure you meet the review deadline for the tour). The cons are that there are very few book tours like this offered.
  • Tours where you must share the book: These are the most common type of ARC tours offered. The pros are that you get to read an ARC! The cons are that you must pay postage, read the book faster, and you don't get to keep the book.
  • E-galley tours: These are closer to the first type of tour in pros- you get to keep the book, you generally have longer to read the book, and you don't have to worry about paying postage. The only con is if you don't have an e-reader (like me!).
You can find a great list of tour sites at Smitten With Books (as well as other ARC information). The two tour hosts I have worked with in the past are Kismet Book Touring and Premier Virtual Author Book Tours. I had positive experiences with both.

Amazon Vine

This is Amazon's ARC program and, as far as I can tell, it is invite-only. I have NO IDEA how Amazon chooses who to invite. All I know is you must post your reviews on Amazon, and you probably need good "helpful" ratings (not sure what they consider "good") and you probably have to publish your reviews often. It seems like members of this program receive a decent amount of books.

See Krystle's comment below for some insider information! (Thank you, Krystle!)


Sources for Reviewers AND Non-Reviewers

Even non-reviewers can receive ARCs! Here are a few ways I know of to snag an ARC if you're a non-reviewer, newbie reviewer, or established reviewer:

Giveaways

There are ALWAYS giveaways going on around the blogosphere, and many of them are giving away ARCs! I got one of my first ARCs from a giveaway hosted by Kelsey from The Book Scout. Different bloggers and authors (yes, authors host giveaways on their blogs!) have different rules (some want you to follow their blog, sometimes you have to tweet, some don't have any requirements, etc), but generally you do not need to be a reviewer in order to enter.

Shelf Awareness

This is a FREE daily e-newsletter you can sign up for, and I'm pretty sure you don't have to be a reviewer. When you sign up, make sure you register for the "PRO" edition. This edition contains a compilation of publishing and book-related news, but it is also the newsletter that has all the ads in it.

Ads? Who wants ads, right? This is one situation where you very much want ads, because these ads more often than not are links you can click on to request ARCs!

I've received a bunch of ARCs through Shelf Awareness and I highly recommend checking it out. The actual content is usually pretty interesting, too.

Random Buzzers

This is a site run by the publisher Random House and there are a few different ways you can get ARCs.

The only way I'm personally familiar with is through their Buzz Bucks program. You fill out little quizzes or do quick activities to earn Buzz Bucks that you can then use toward getting books. Most of the books are finished copies, but sometimes they do offer ARCs (though, really, free finished books are pretty exciting, too!).

They also have message boards where you can sign up to receive ARCs. I've never participated this way, so I can't give any details, but it seems like a great program.

Swap with other bloggers

A ton of bloggers are more than willing to swap books with you. Off the top of my head, I know Tayte from Reading in Paradise is currently looking to swap books.

Ask your local librarian or bookstore

These people sometimes receive ARCs. It can't hurt to politely introduce yourself and ask if you can leave your contact information with them in case they have any ARCs they are willing to pass on to you.  


3. Should you write a review policy?

YES! Even if your blog has only been running for a day, you should write a clear and to the point review policy. You can use my Review Policy as a guide if you'd like.

The biggest shock to me when I first started blogging was the incredible number of authors who would contact me for review requests (particularly indie and self-published authors). This WILL happen to you, so it's best to be prepared.

What you should include in your review policy:
  • What book format do you accept? Not accept? (ARCs, finished copies, audiobooks, e-books?)
  • Will you accept self-published or indie published books?
  • What broad genres do you accept? Not accept? (YA, middle grade, adult?)
  • What specific genres do you accept? Not accept? (Dystopian, fantasy, paranormal, contemporary, etc?)
  • Contact information (include your email address, do not include your mailing address)
You can also state what publishers/authors can expect if you accept their request, like how long it will take you to post your review, what your reviews include (rating, summary, etc), and any other places you will post your review or mention their book.

You might also like to include information on whether or not you will host giveaways, author guest posts/interviews, blogger guest posts, and if you will participate in ARC tours.

Review policies will make your life so much easier. Trust me. If you need to decline a review request (and you will encounter this at some point), it is much easier to point to your review policy ("I'm sorry, as stated in my review policy, I am not currently accepting e-books/short stories/dystopians/books with a character named Frank/etc for review").

Your review policy will also help you avoid getting review pitches you don't want anyway. Some people won't read your policy, but many will (my self-published requests dropped drastically after I stated in my policy that I am not accepting self-published books for review). Stating what you will and won't review up front saves both you and the requester time and frustration.


4. What to write in your request?

There are many different ways to go about writing a review request. The following is a list of things you may want to include:
  • Briefly introduce yourself (use your real name, both first and last)
  • Blog name and type of books you review (YA, MG, adult?) 
  • Blog link, and links/mention of any other place you regularly post reviews
  • Your blog stats (Date/Year you started blogging, number of unique visitors per month, pageviews per month, how often you update your blog--NOT including memes, etc)
  • How you promote books on your blog (reviews, author interviews, author guest posts, giveaways, etc)
  • If you work in a book-related field, include that (library, bookstore, etc)
  • A short reason why you're interested in the book, if applicable (don't make this about YOU, show how you can help THEM) 
  • Your mailing address (very important to include!) and your email address (yes, write it out)--you can include this in an electronic signature
  • The title of the book(s) you are requesting (+ ISBN/Imprint, author, publication date)
  • Links to previous reviews you have posted, preferably for the same imprint or similar book (thank you Jana!)
You want your email to be polite, professional, and to the point. Remember the purpose of an email like this is to of course request a book, but also to show the publisher/author that you would be a profitable person to send a limited ARC. This is business. ARCs and shipping cost money, so you need to show that you will do something that will make their expenditure worthwhile.

When I first started requesting ARCs I was SO shy (ok, I still am) and I ended up writing very little in my request. Too little. I pretty much stuck to my blog stats and the book's information. My requests had no personality and did nothing to show the publisher what *I* could do for *them*. Even though it may feel uncomfortable tooting your own horn, it is important you include enough information about your blog and your accomplishments.  

As far as I can tell, it is better to include all of your review requests in one email. That is, if you are requesting three titles from one publisher, ask for all of them in one email, not three separate emails.

If you are contacting the publisher for the first time, try to keep your number of requests to a minimum. Newer bloggers are more likely to receive titles that are not getting as much advertising attention. At this time, you may also offer to host an author interview/guest post. If you are more established, you may also offer to host a giveaway.


4. What to do after you've requested the book?

Wait. Don't bother the publisher with a million follow up emails. Publishers are very busy and oftentimes they won't even email you back (the book will just appear in your mailbox...or not).

If you get the book, great! Read on to #5.

But what if you don't? It's disappointing, I know (really, I know), but it isn't the end of the world.
  • Do not get discouraged--review requests are denied for all sorts of reasons, and some of the reasons have nothing to do with you personally
  • Do continue working on improving your blog (there is always room for improvement)
  • Do not argue with or insult the publisher/author--be gracious, say thank you for their time, and move on
  • Do read the book when it releases (you wanted to read it, right? Now you can!)
  • Do send your review to the publisher
  • Do not say anything snarky about them denying your request
  • Do wait a few months and then try again for a different ARC (maybe ask for a "smaller" title)

5. What to do after you've read the book?


Writing your review

You write your review! If you request an ARC, then you should write a review for it, even if you did not love the book. It's ok, publishers understand not every book will work for every reader. Just make sure to keep your review respectful.

If you absolutely cannot write a review, then it would be good to try to find another blogger who will read and review the ARC you received. You may also want to email the publisher and ask them what they prefer you do. You can offer to find another blogger to pass the ARC along to or see if the publisher would like you to host a giveaway for the ARC.

Publishers don't expect you to review every book they send you, especially if they've sent you a copy you didn't request. BUT, if you consistently receive ARCs but then do not review them, they will take note of this eventually and they will stop sending you ARCs. So if you want to keep receiving them, then you should review them. 


When to post your review

You can post your review whenever you'd like (unless the publisher/author requests a specific date), but publishers tend to prefer you post your review within a month of the book's release.

Most don't mind if you post up to a month before the book releases, but some publishers (like Simon & Schuster) ask that you wait until after the book has been released. Check NetGalley's Publisher Approval Preferences page for specific publishing house preferences.

Also make considerations for what your blog readers prefer. If your blog primarily caters to librarians and booksellers, then you may want to post your reviews much earlier as these types of readers tend to use reviews for collection development.

If your blog primarily serves people who read for pleasure, then sticking to the "around release date or later" rule of thumb is a good idea (these readers--myself included-- often get frustrated if they can't buy the book soon after reading the review. Plus, it's also easy to forget about a book if you hear about it too early).


Follow up

After you've posted your review, you should email a direct link to publisher and thank them again for the opportunity. If you post your review to any other site (Goodreads, Amazon, etc), then be sure to also include direct links to your review at these sites.


What to do with the ARC

If you do not want to keep the ARC after your review has been written, then you can give it away. Your local librarian or bookstores may appreciate getting your ARCs (they use ARCs to help determine whether or not they want to purchase the book for their collection. Librarians also use them as giveaway prizes.).

You can also give it away or swap with a friend or another reviewer/blogger. You can host a giveaway on your blog, donate it to an ARC tour site, or set up an ARC tour of your own. If you host a giveaway, then authors and publishers usually like to know about it so they can help you spread the word (more pageviews for you = good, more publicity for them = good).

The only thing you should NOT do with your ARC is sell it.


6. Additional information

The following are sources for additional information about ARCs. All of the sources are phenomenal and I highly recommend checking them out. Many other bloggers have written up advice on acquiring ARCs. If you know of any I haven't listed, please link them in the comments!

Presenting Lenore

Reviewer X

Books with Bite

Bookalicious

All Things Urban Fantasy

Authors and Publishers


What have your experiences been with requesting ARCs? Do you have any advice or links to share? Please feel free to ask questions and answer whatever questions may be posed in the comments!

Thursday, January 12, 2012

3 Ways to Attract New Blog Readers


3 Ways to Attract
New Blog Readers
through Hosting


Part 3 of the series
How to Attract Readers to Your Blog


What You Will Learn

You spent days (or weeks! Months!) setting up your blog, perfecting your design, and writing quality content…but you have no readers! Before you can even begin to worry about developing a following, you first need to let the world know your blog exists. But how do you get your name out there?

I've been asked by a number of people how I network my blog to attract readers. To answer that question, I’ve written a series of Blogging Tips and Tricks posts. In each post in the series I will outline a few methods for attracting new readers to your blog. I am NOT an expert and these tips are based on my own observations and experiences.

Previous posts in the series:

Let's Do This!

Method 1: Host a Giveaway

One of the fastest ways to get people to look at your blog is to offer them a chance to get something for free. Giveaways are great for exposure.

You have a couple of choices when you do this. You can:
  • Make following a requirement
  • Not make following a requirement
  • Require/give extra entries for spreading the word

Obviously having following as a requirement will make your follower numbers skyrocket. All I have to do is follow you with no intention of ever reading your blog and I could win something? Score! Lots of people will follow you (though probably not me. I feel like I'm lying if I do that).

The downside? Many of these people are not "true" followers in the sense that they'll keep coming back.

Personally, I'm a statistics junky, so I don't like muddying my follower stats with these types of followers (they're also the most likely to un-follow you, which always makes me sad).

Also, not everyone who reads your blog is going to be a blogger, so making following a requirement may alienate your most devoted readers! I started reading blogs long before I had an account with Blogger and I'm not the type of person to subscribe through email, but that didn't make me any less of a follower.

Because of all of this, I will never ask you to follow my blog in order to enter a giveaway. BUT, my follower numbers are also a lot lower as a result.

So there are pros and cons. This is a personal choice and only you can determine what is right for you and your blog.

Giving extra entries is a great way to help spread the word about your blog. Basically, you're getting the people who enter your giveaway to do a little leg work for you and, as a result, your blog will be exposed to lots of untapped readers.

The only reason I don't normally do this is because I'm too lazy to add up extra entries (it was CRAZY the one time I did this, though I did have "unconventional" extra entries). But, there again, my blog's exposure is probably taking a hit.

I hear Rafflecopter is great if you want to use extra entries (I will probably never use Rafflecopter because I don't like it. But that's a whole 'nother conversation).

Making extra entries a requirement may turn some people off, too (not everyone uses Twitter and Facebook! Like, um, me...).


How to spread the word about your giveaway:
  • Join a giveaway hop
  • Sign up your giveaways with Candace's Saturday Situation
  • Send invitations through Goodreads (but not too many, please!)
  • Announce it on your blog sidebars 
  • Announce it on the bottom of your blog posts (for those who read your blog in a feed reader)
  • Announce it on Facebook/Twitter
  • Make a button for people to grab
  • Require/offer extra entries for spreading the word
  • I'm sure there are other ways, what do you suggest?


Method 2: Host an Event

Hosting an event is a great way to expose yourself to new readers. Just look at Busting the Newbie Blues for an example! I also recently co-hosted the Historical Fantasy Jubilee.

I saw an increase in followers as a result of both events, but even more importantly those events have been great networking opportunities. Almost every blog that signed up for Busting the Newbie Blues last year are blogs I still read now, and I've found many more to add to my feed reader this year.


What did I do to spread the word about Busting the Newbie Blues?
  • I emailed bloggers who I thought might be interested and asked if they would join
  • I made a button for people to add to their blogs
  • My event includes interaction where bloggers make a post on their own blogs

What did we do to spread the word about the Historical Fantasy Jubilee?
  • Ruby and I sent out email invitations to select bloggers and encouraged them to invite their friends
  • Ruby and I made event and game buttons for people to add to their blogs
  • Ruby tweeted links to our event
  • Some of our giveaways offered extra entries for tweeting
  • We added our giveaways to linkups like Candace's Saturday Situation (and others)
  • The authors who participated in the event spread the word through their own social networks

What you should keep in mind:
  • Hosting an event takes A LOT of time and effort, so plan your time accordingly
  • The more involved you are, the more involved others will be


Method 3: Host a Challenge

Hosting a challenge is not something I have done yet, but I imagine it would be a good way to attract readers to your blog. Not only that, but it is a great way to get readers to keep coming back to your blog.


Why it brings in readers:
  • They're first introduced to your blog when they sign up
  • They keep coming back to your blog to report their progress
  • They'll talk about your challenge on their own blogs

What you can do to spread the word:
  • Make a button (challenge participants love buttons!)
  • Send out an invitation on Goodreads
  • Advertise your challenge on your own blog (so people passing through will stay)
  • Use Facebook or Twitter
  • Send email invitations to people you think might be interested (but don't be spammy!)

What you should keep in mind:
  • Hosting a challenge takes a lot of time and effort
  • The more involved you are, the more involved others will be
  • Make the rules clear
  • Don't change the rules partway through! 
  • Be on top of things--if you have a linky list each month, make sure you put it up at the beginning of every month
  • From the beginning, clearly state what participants need to do when they finish the challenge
  • Check out The Story Siren's Debut Author Challenge or Stalking the Bookshelves and I Eat Words' YA Series Challenge for examples of well-run challenges


What do you think are good things to host?
Have you hosted any of these?
Do you have any advice about what to do or not do when acting as a host?


Click here to make a request for a future Tips & Tricks post.
The form is anonymous, so please don't feel shy at all! 

I'm certainly not an expert, but I'll try my hardest to explain what I do know and research what I don't know. Please keep in mind this feature will only appear once a month, so it may take some time for me to get to your question--but I promise you I will!

Click here to read previous Tips & Tricks Posts

Thursday, January 5, 2012

Tips & Tricks Challenge


Welcome to the first Tips & Tricks post of this year's Busting the Newbie Blues!

Click to learn more about Busting the Newbie Blues!

Part of being a newbie is having a TON of questions (and, honestly, oldies have a lot of the same questions). I've answered a bunch of these questions last year through my Tips & Tricks series and I've compiled most of them here for you to browse through.

And, because January is all about signing up for challenges, I'm turning this into a mini challenge!

Don't worry, there aren't any big rules or requirements (I'm all about fudging challenge rules anyway). There aren't any levels or prizes. It's all very low key.

All you have to do is:
  1. Pick one thing (or more!) from the list below and DO IT
  2. Come back to this post and leave a comment telling us what you did
  3. Leave a link to your post/blog so we can all check out your results and give you lots and lots of praise!
Not sure how to leave a clickable link? Check out my Tips & Tricks post about anchor text.


What do you do?

Any of the following Tips & Tricks qualify, plus any future Tips & Tricks posted throughout this event. YOU CAN DO IT!

The List:

Blog Design

Basics

How to Make a Full-Screen Blog Header
How to Make a Sidebar Header
How to Fix Overhanging Sidebar Images

Icons and Buttons

How to Make a Button
How to Make a Scrolling Widget for Blog Buttons
How to Make Social Networking Icons (Goodreads, Facebook, Twitter, etc)
How to Make an "Email Me" Link and Icon

Personalize

How to Add a Signature to Posts
How to Customize a Comment Form Message

More HTML (made super simple)

How to Make Colored Boxes
How to Make Borders
How to Make a Progress Bar (for challenges)
How to Customize a Progress Bar


Attract Followers

Blog Promotion

How to Increase SEO with Post Titles
How to Increase Blog Readership with Search Engines
4 Ways to Gain Readers Using Comments

Suck Readers in for Hours!

How to Make Anchor Text
How to Make Named Attribution Jumps
How to Maximize Links, part 1
How to Maximize Links, part 2
How to Use Labels (Tags) to Increase Blog Traffic


Now go ahead and pick one! Make sure to come back here and share your success with us!

(And if you're having trouble, don't worry. Come back and ask questions so I can help you out.)

Related Posts Plugin for WordPress, Blogger...